Wednesday, May 3, 2023
Earn API allows you to access various liquidity pools on different blockchain networks and deploy funds simply through REST API. The funds deployed are working investment pools that users in your product can invest in real-time, and earn transaction fees and token rewards. These incentives can come in the form of earning additional tokens or a percentage of the transaction fees generated by the Liquidity Pool. Or the liquidity providers get pool tokens of the specific protocol.
ThirdFi provides Earn API that creates a liquidity session where a user can provide liquidity to the pool by connecting their wallet. We currently support Metamask Wallet, WalletConnect, Crypto.com, OKX Wallet, KuCoin Wallet and Fluent Wallet.
The Liquidity provider generally takes two crypto pairs for providing liquidity. But we also provide Single Side Asset Liquidity which involves providing liquidity with a single token asset. It reduces the need for managing multiple assets.
How to use ThirdFi’s Earn API
Create an account on https://app.thirdfi.org/ and you will be redirected to the dashboard like this below.
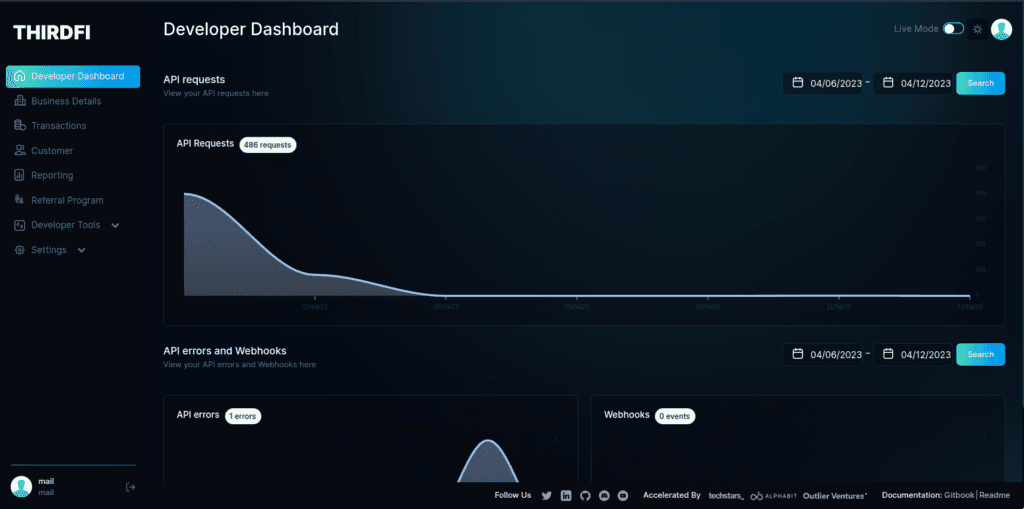
2. From the setting menu, select sandbox environment for testing purposes. You can do the same with ‘API setup’ instead of selecting ‘Sandbox’ environment.
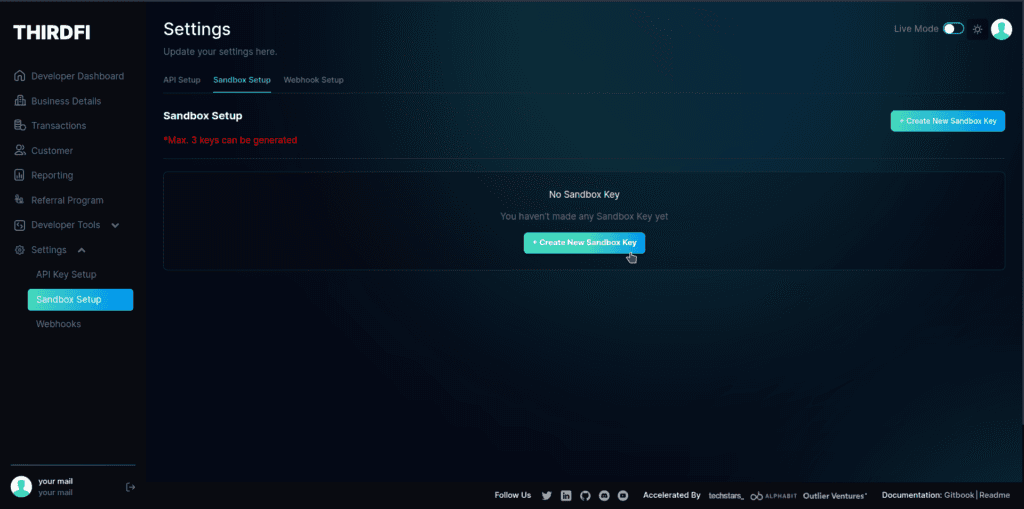
3. From the dashboard, click on ‘Create New Sandbox Key’ to get an API Key and the Secret. Save these keys and keep them secret as these will be used to make API calls.
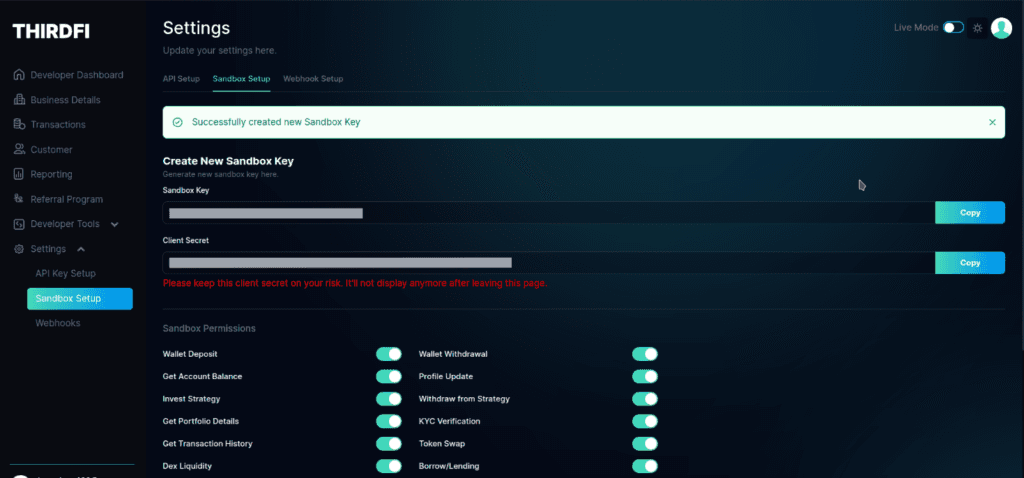
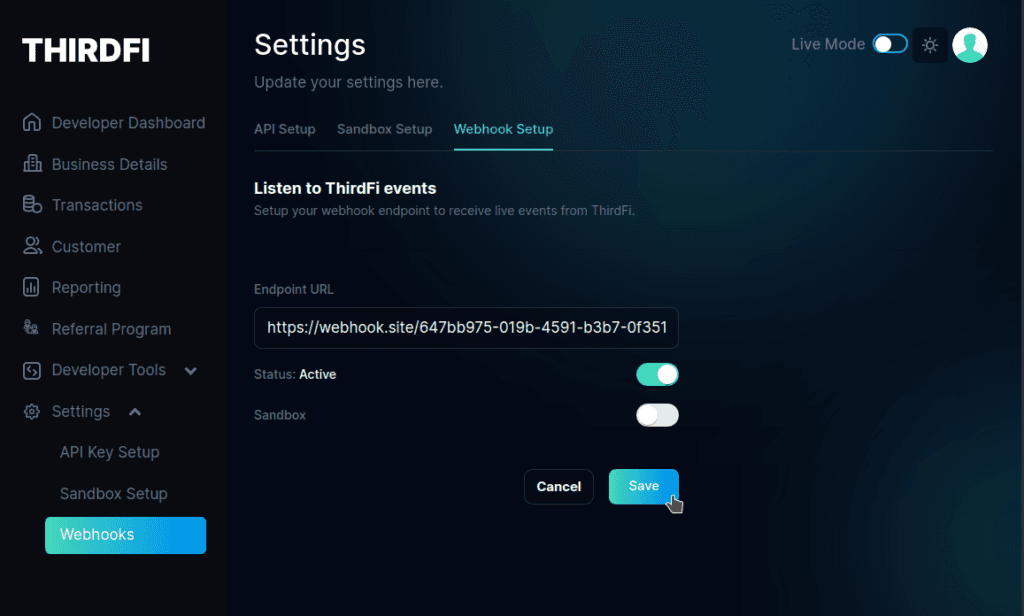
4. Also, let’s setup a webhook to listen to any transaction event and get updates of the user transactions.
You can https://webhook.site to get a custom link to receive a webhook. You can also use your own site for the same and listen to the events.
ThirdFi will make a POST request to the link whenever a transaction is done.
5. Let’s try out the Earn API. Head over to the docs here to know more. Also, check out the API reference to know how to get started.
To create a Earn session, we need to do a POST request to this API – https://sandbox.thirdfi.org/api/v1/sessions/liquidity with a required “body” in the request.
Below is the body for the same, here pair, userEmail, amount0, amount1, isNative, addLiquidity and chain are the required fields and others are optional.
Below is the body if you want to provide liquidity with only a single asset. The pair needs to be provided but only one token amount is required. Also, the body should contain the ‘inputTokenSymbol’ as the token that will be provided by the user.
Let’s Test the Liquidity API
Let’s make an API call using NodeJS, you can find the code here.
To know about the API headers and library used, head over to this ThirdFi Getting Started Blog.
There are three API headers that are used in ThirdFi API requests and all of them are required to successfully make an API request. In Postman, we have already added a pre-script to load the API headers but we need to calculate them programmatically.
x-sec-key : ‘API KEY’
x-sec-ts : ‘Timestamp’
x-sec-sign : ‘Hash Value’
The Hash value is calculated using the HMAC-SHA-256 function which takes two inputs, one is the base string and the other is the SECRET key.
Result(after calling the API)
To run the code, you should have NodeJs installed and to run you have to run the below command
node path/to/the/code/file

The highlighted session URL can be used for providing liquidity, let’s try out requesting the API from Postman too. Afterwards, we will see how the liquidity session actually works.
Using Postman to Call Liquidity/Earn API
Fork this Postman Workspace and add your API key and Secret to the ThirdFi environment. You have to fork it before making any request.
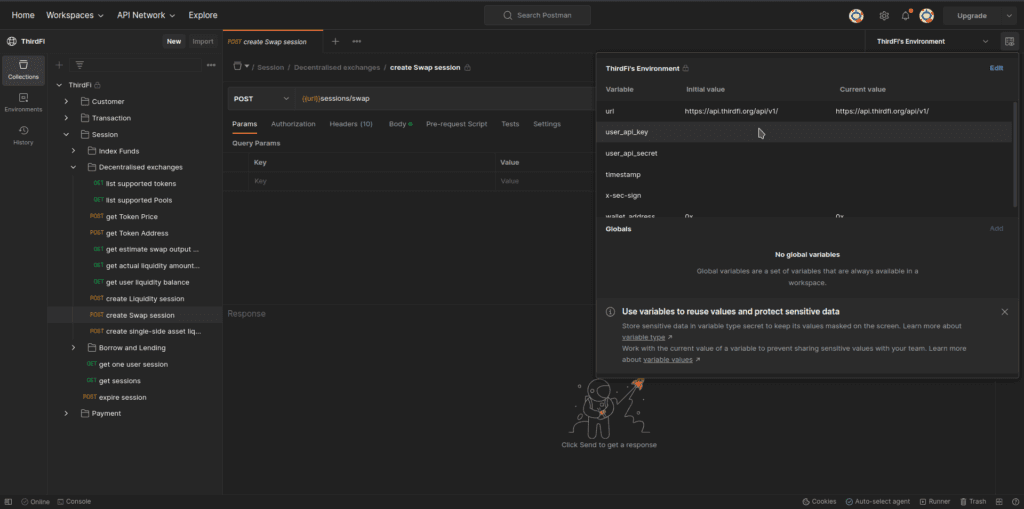
2. If you have already forked and added the API keys, let’s make an API request now.
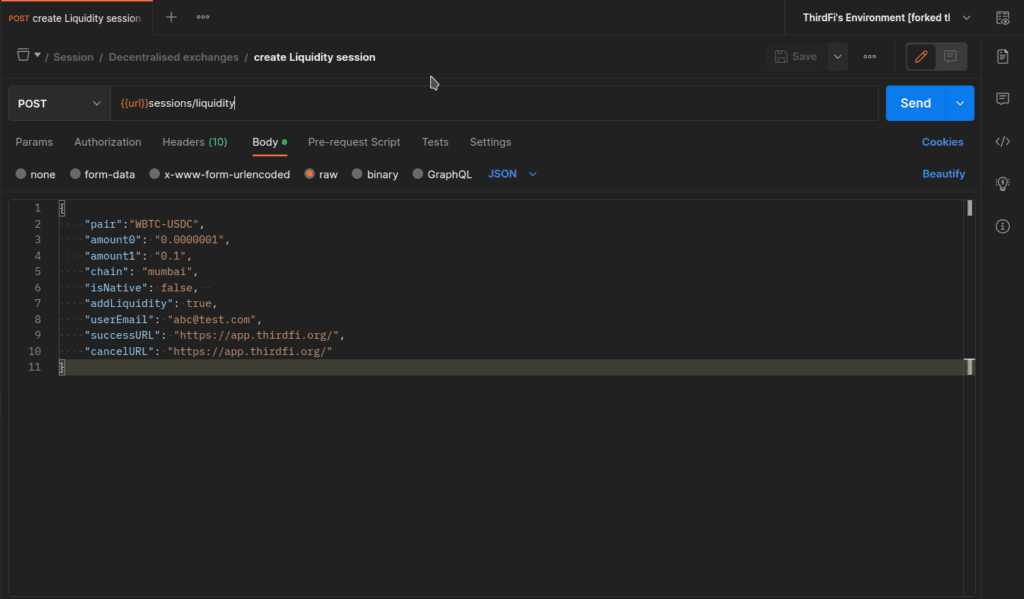
3. Check out the Response for the “URL” part.
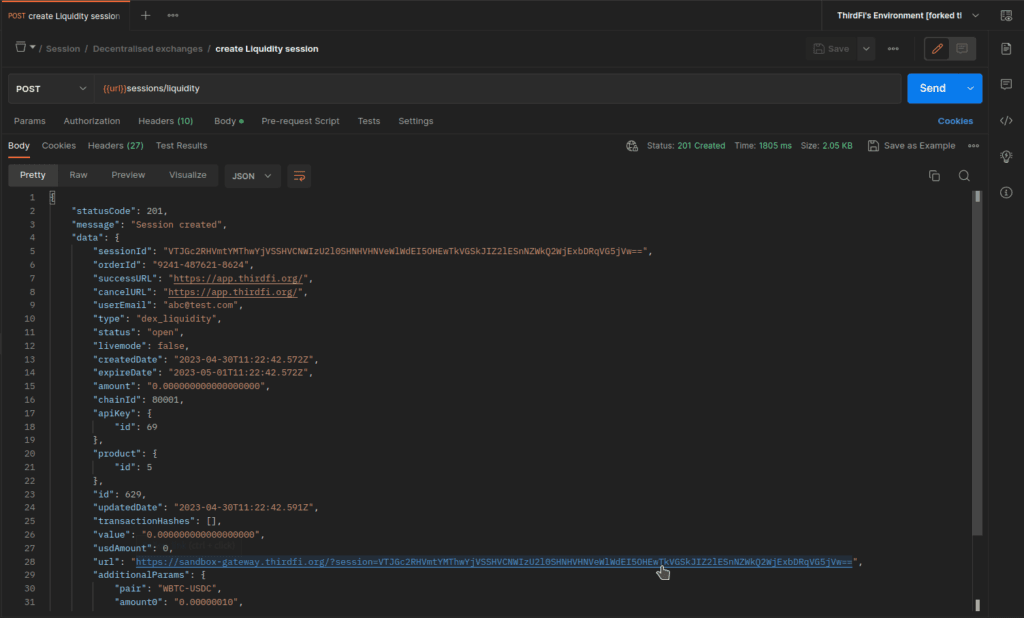
Testing out the Add Liquidity Session
1. Open the link in the browser window.
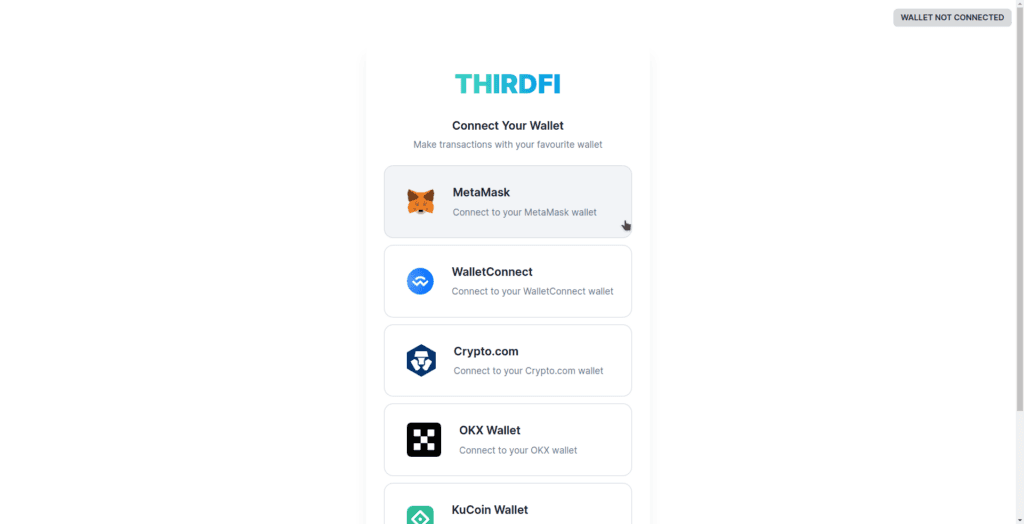
2. Connect your wallet on the page.
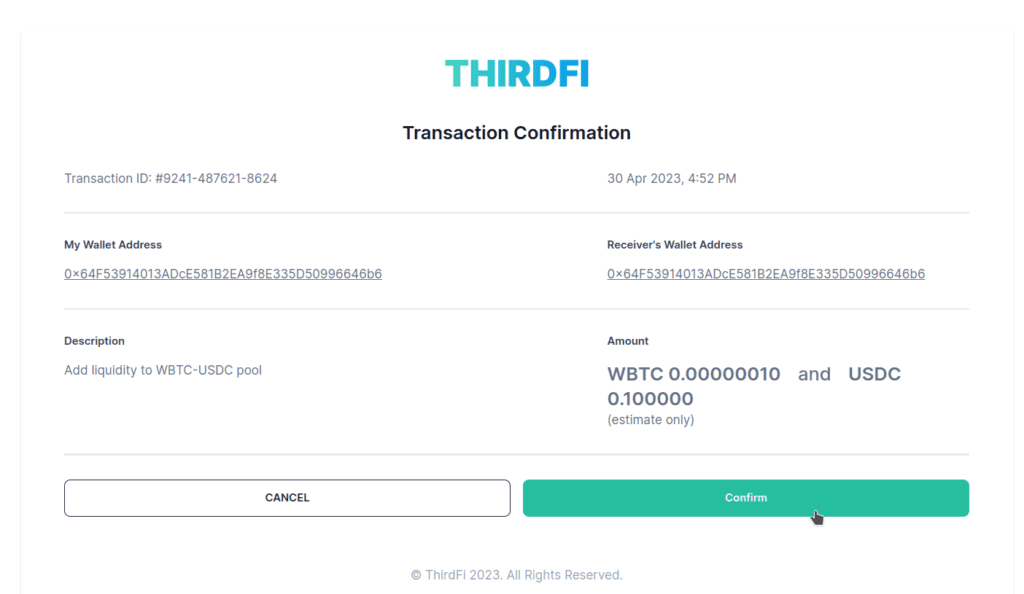
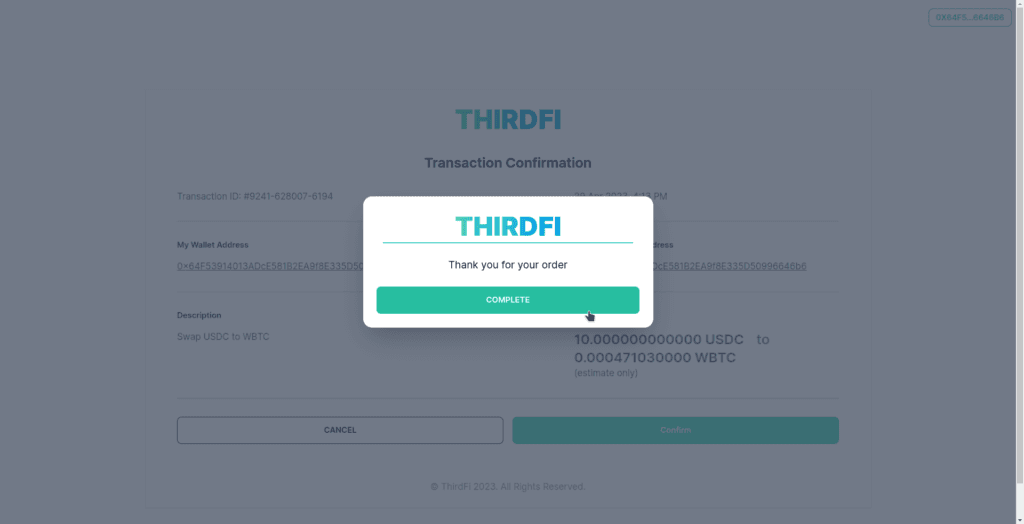
3. Click on confirm the transaction and sign the transaction popped up on the wallet.
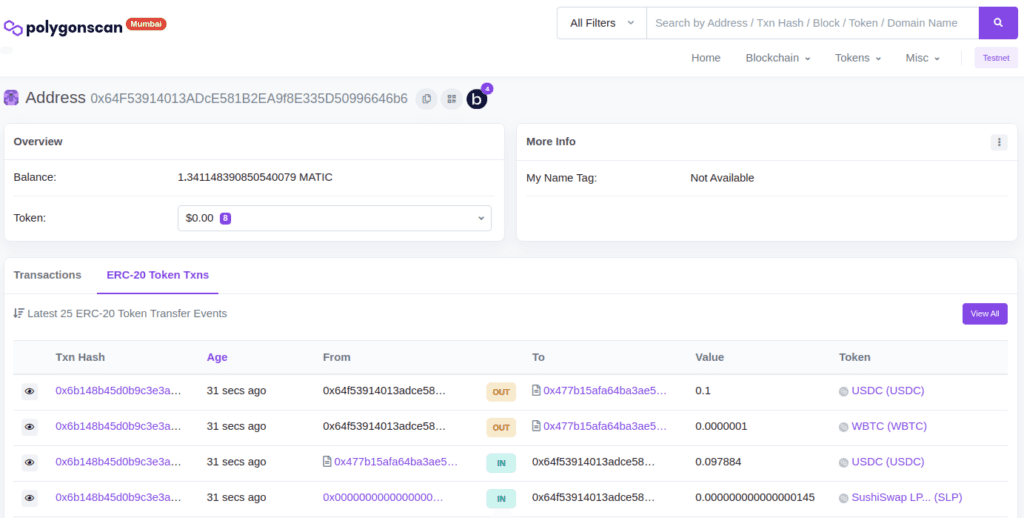
4. Here is the transaction on the explorer.
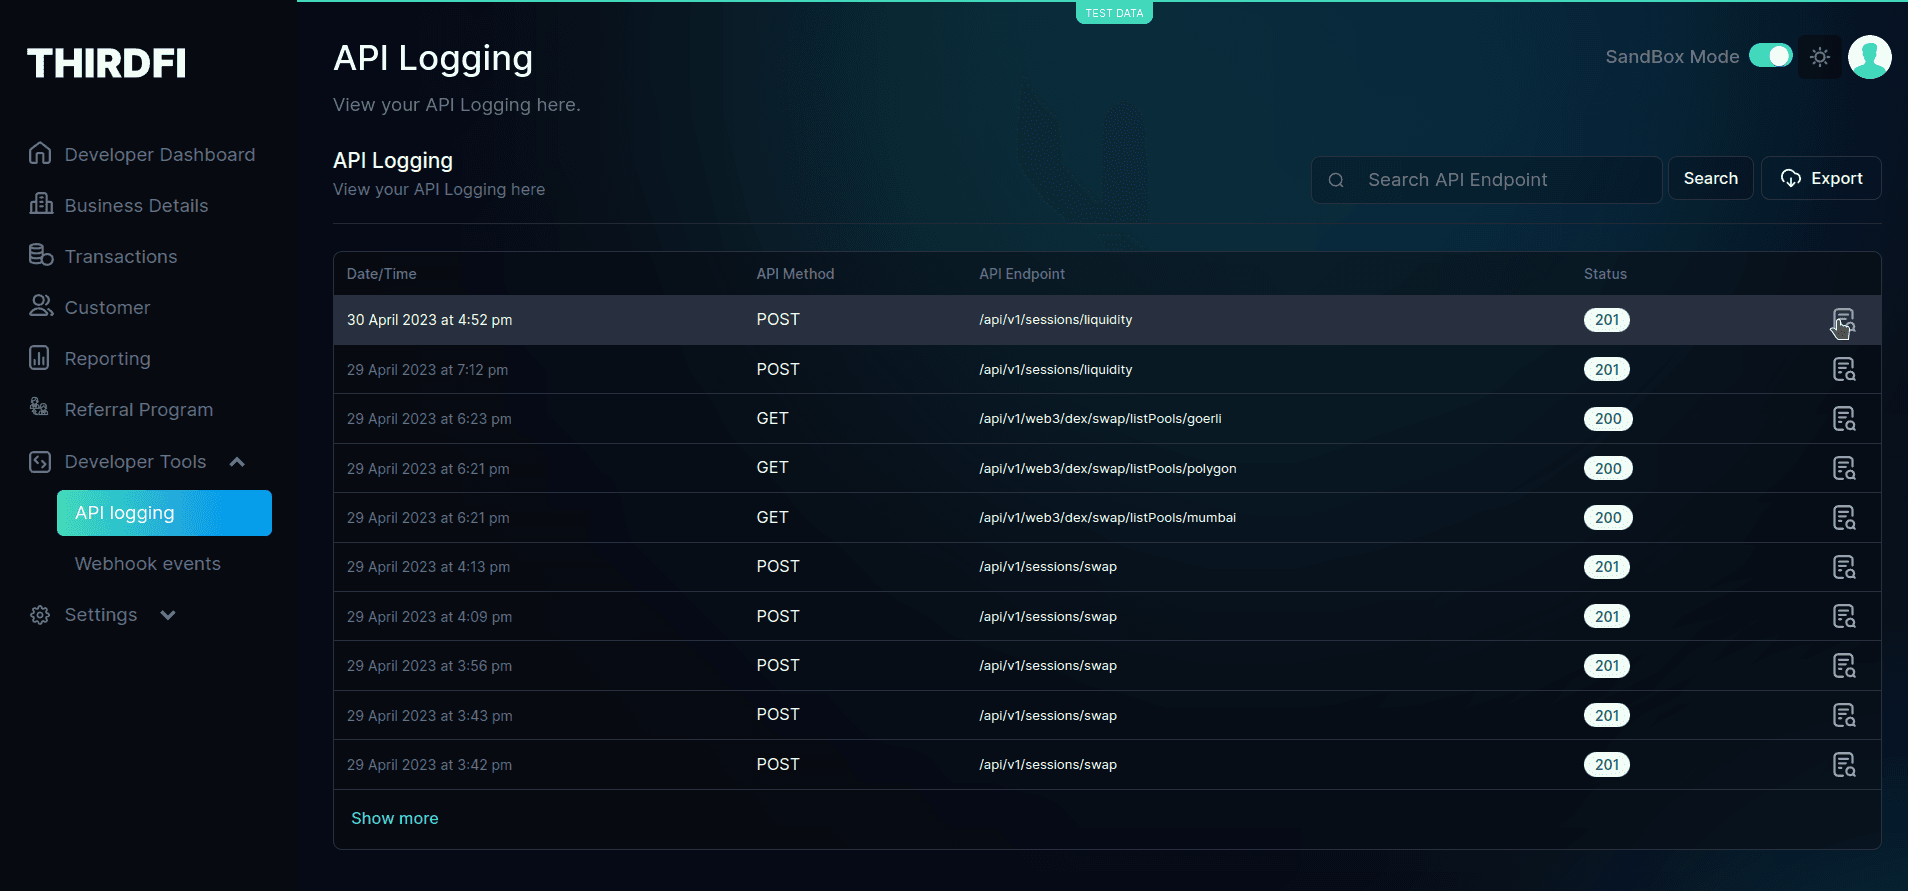
5. Developers can check about the transaction on their API dashboard too.
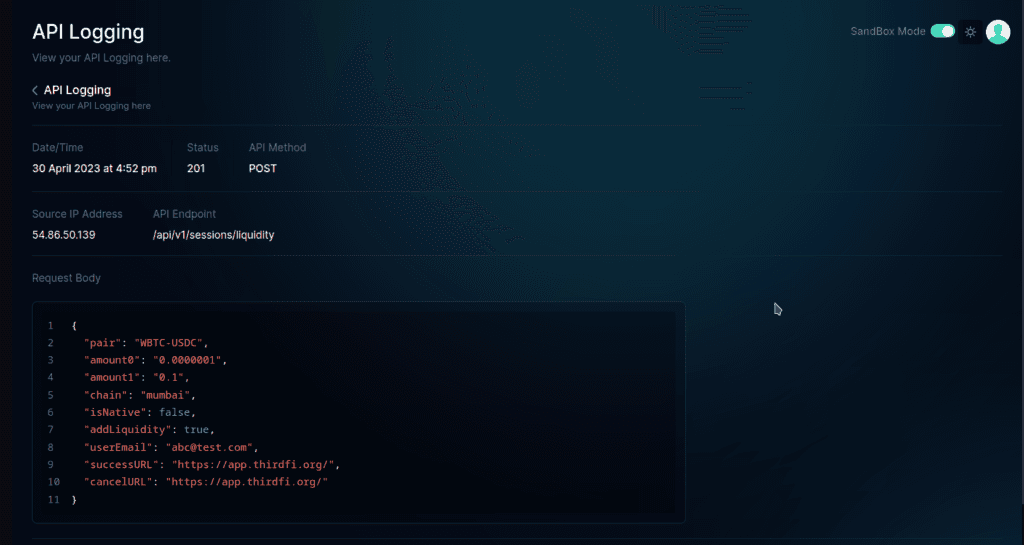
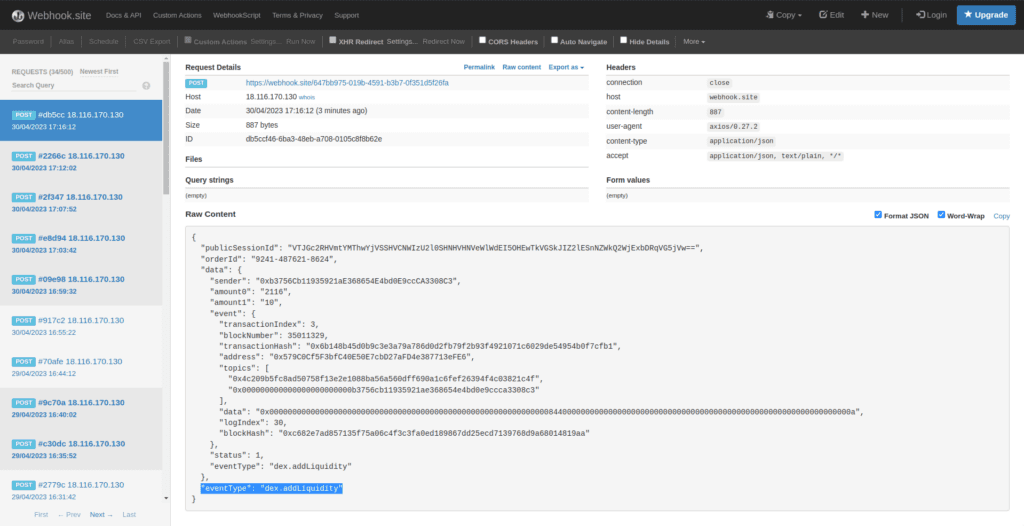
6. Remember, we have added a webhook on the dashboard at the start. ThirdFi must have triggered a POST event to the webhook URL.
Below is the https://webhook.site page that received the event.
7. The triggered events on the webhook can also be tracked in the ThirdFi dashboard in the webhook logs.
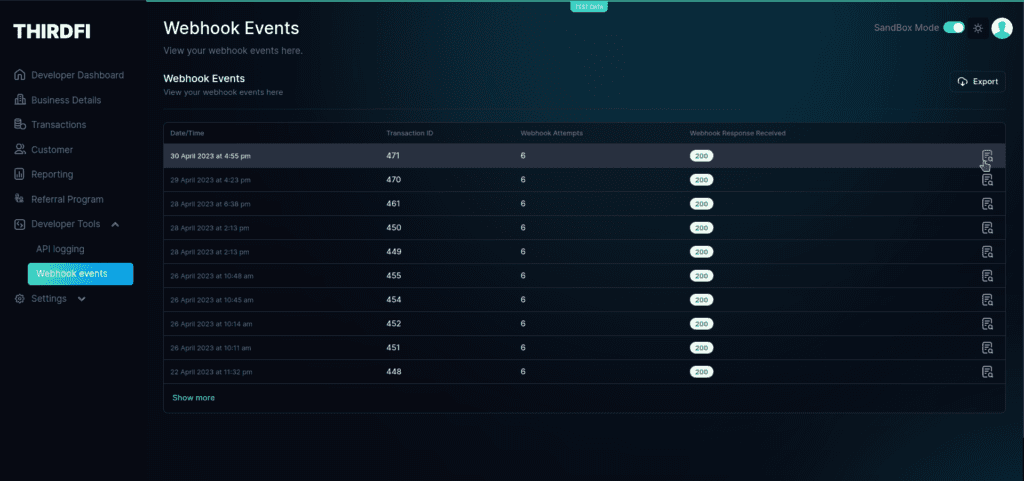
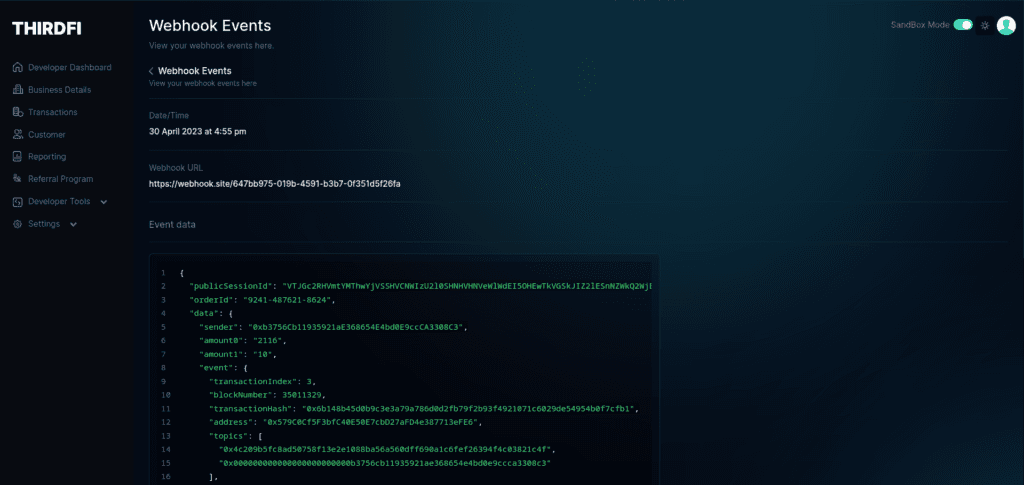
All webhook events have an “eventType” in the JSON object. The event type can help the developers to know what transaction triggered the event. Also, the webhook event contains all these important details about transactions in the “data” field. Most importantly, the developers can make an update to the User based on the transaction data such as transactionHash, status and crypto amounts transferred.
Removing Liquidity from the Pool(Getting Earn Token)
Removing Liquidity is very similar to providing liquidity to the pool. To Remove liquidity from the pool and withdraw your funds from a decentralized exchange (DEX). You can change “addLiquidity” to “false” in the JSON body to remove liquidity from the pool. In return, the user will receive LP tokens that represent their share of the pool. When you want to remove your funds from the pool, you need to burn your LP tokens, and you will receive your proportional share of the assets in the pool, minus any fees.
1. Removing Liquidity for Dual Assets
When removing liquidity with the dual assets, the user needs to provide the amount of both assets that need to be provided in the body. Below is the body that can be provided.
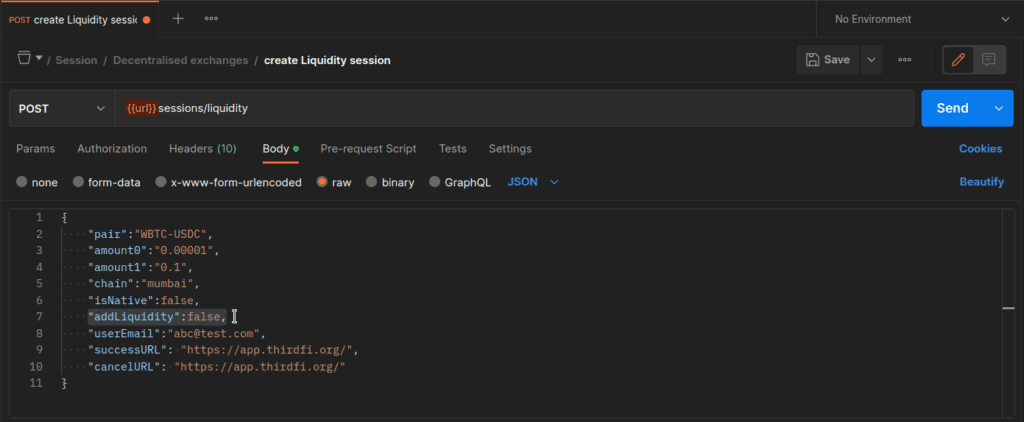
Call the API by putting “addLiquidity” to false to get the session URL. You can use the link to connect your wallet and withdraw your funds from the pool. You will get the below page when removing liquidity with dual assets.
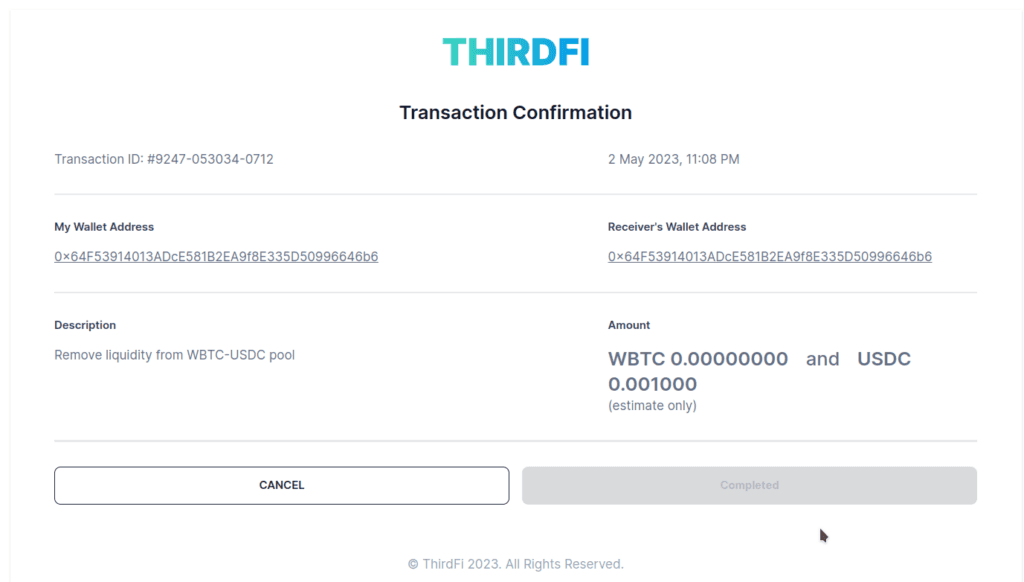
For the pair(WBTC-USDC), the pool takes back the LP token and return back the pair based on the liquidity and rewards accumulated by the tokens. At the time of this blog, 0.1 USDC is nearly equal to the 0.000000000000007306 LP tokens, so the respective WBTC and USDC are returned. The assets will be returned after the transaction.

2. Single-Side Asset Liquidity
To remove liquidity from single-side asset liquidity you can change “addLiquidity” to false. InputTokenSymbol is not required to remove liquidity; the amount will refer to the amount of LP tokens to be withdrawn. The LP token will be liquidated to get back the tokens of the token pair. Below is the body that can be provided to the single-side asset API to remove liquidity from the pool.
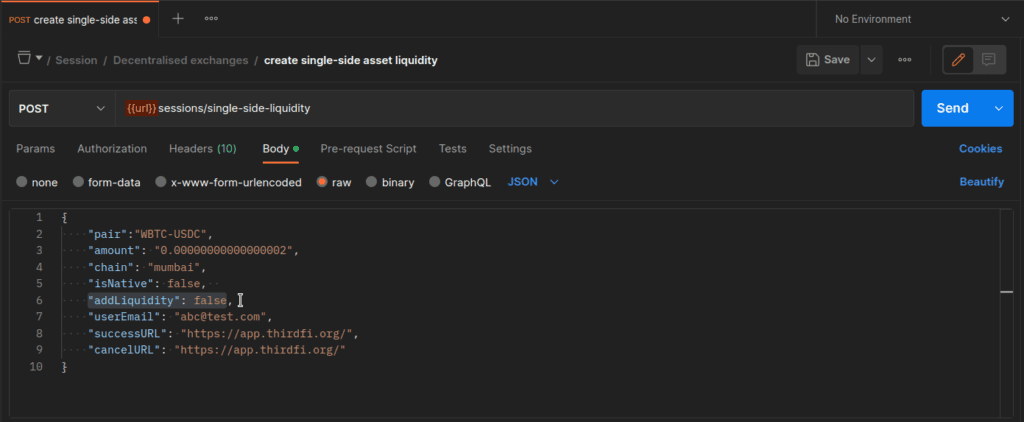
For the above API call you will receive a session link in the response. The link/url can be used for connecting wallet and doing the transaction.
Below is the transaction page and after confirming the transaction the asset will be returned.
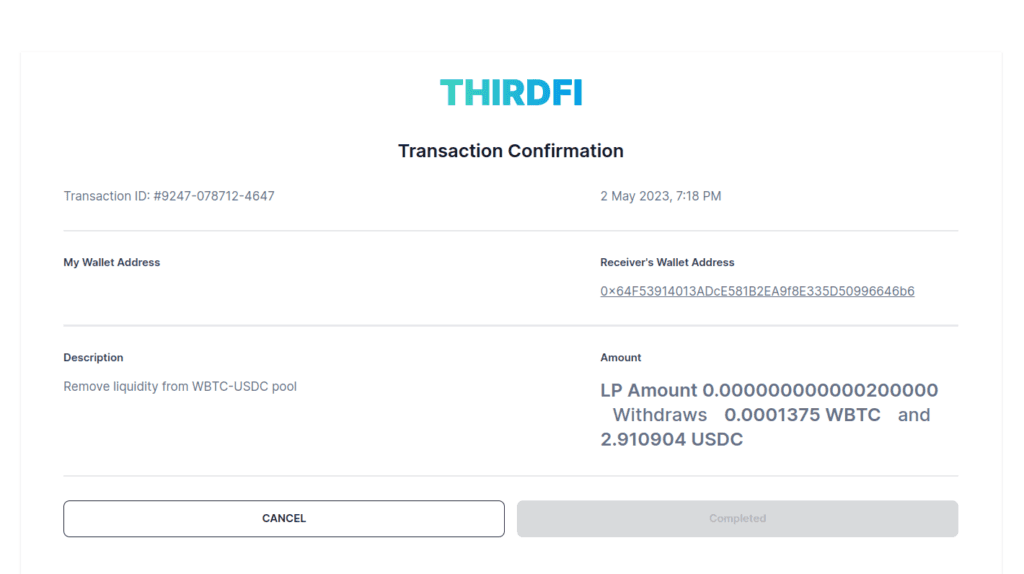
The LP token will be exchanged for the crypto assets(here WBTC and USDC).

Hope you find the blog useful. Check out our docs here to know more. Also, here is the API reference to learn more about the Earn API and check out it’s working.
Feel free to reach out to us on our Socials
Read More
